
A beginner’s guide on how to make a WordPress website on your own, without writing a line of code. You will be surprised to see how easy it is to set up a WordPress website these days. To set up and customize a basic WordPress website these days, you don’t need to hire a digital agency and spend a lot of money on web development. The only thing that you need to do is to follow this tutorial to the end of it. After you finish it, you will have a fully functional website, created at a minimum cost.
Video guide: How to create and set up a WordPress website in 2026
In the video guide, I have set up a fully functional website from the ground up. For those of you who prefer reading over watching a video, I have also prepared a detailed written guide on how to make a WordPress website like a pro. No technical knowledge is required.
Table of Contents
- Planning our Website
- Setting up Hosting and Domain
- Installing WordPress
- Installing and Setting up Prespa Theme
- Customizing the website
- Creating a Contact Form
- Embedding a Map
- Backing up your WordPress Website
Planning our Website
Before starting our website, we need to make a plan for what we want to achieve and what our website will be about. Will it be a travel blog, a musician’s space, a cooking masterclass, a freelancer portfolio website, or an e-commerce shop? Do we plan to monetize or it will be just for fun? Once we have a clear idea and we have made a good plan, we can move on to the next part.
Setting up Hosting and Domain
To have a website, you first need a place to host your files like our partners from HostArmada, and a unique domain name. In order to be accessed on the internet, your website needs to be hosted or stored on a special computer called a server. This server needs to have 24/7 access to the internet. When you type the website address or domain name in your browser, for example, yourawesomesite.com, you will be pinging a remote server which will then retrieve the page you have requested via the browser. This means that before installing WordPress, you need to ensure that these two things – hosting account and domain name have been up and running. Skip this part if you have already set up hosting and domain or you fully understand the difference between WordPress.com and WordPress.org and you are convinced you need WordPress.org over WordPress.com
Differences between WordPress.com and WordPress.org (spoiler alert – always choose WordPress.org)
Before jumping into registering a hosting account and a domain name, let’s first have a look at the different options and figure out what is best for our use case.
WordPress.org
WordPress.org, aka “the real WordPress”, is a popular software for creating and managing websites, which has garnered considerable praise and popularity in the digital world. It has unlimited customization options due to its open-source nature and the extensive community support it receives. With the help of WordPress, you can create websites without any technical knowledge.
It is an open-source software, and it’s 100% free for anyone to use. All you need is a domain name and web hosting to get started. This is why it is also referred to as self-hosted WordPress.
Advantages:
WordPress.org gives you the absolute control. It offers webmasters the creative freedom to customize everything on their website, without any restrictions.
Here are the key advantages of using WordPress.org for building your website, which is why we consider it the best choice for website building:
- Low cost: WordPress software is free of charge. You only need a hosting and domain to get started
- Easy to use: The WordPress software is not only free and open-source but also user-friendly. It comes as no surprise that it powers over 43% of all websites on the internet. You don’t need to be a developer anymore to create, set up, and manage a WordPress website
- Full control: You have full ownership of your website and its data. There’s no risk of your site being shut down due to someone else’s terms of service. The control is entirely in your hands.
- Endless customization options: You have the flexibility to incorporate all WordPress plugins/apps that have ever been created, whether they are free, paid, or custom-made.
- Endless design options: Your website’s design is completely under your control. You can choose from all free or premium WordPress themes out there, or even opt for entirely custom designs and modifications.
- Monetization freedom: You are allowed to show your own ads. You are free to monetize your WordPress site your way. You will not be sharing the profits with intermediaries.
- Advanced analytics: Access to advanced tools like Google Analytics is available for tailored analytics and tracking.
- E-commerce friendly: Self-hosted WordPress allows you to set up an online store
- Membership capabilities: You can also create membership sites, restrict access to premium content, create courses, forums, etc.
These benefits clearly demonstrate why WordPress.org is so widely adopted and recognized as the best platform in the world for building versatile and fully controlled sites.
Disadvantages:
- Like all websites, you need a web hosting and domain, which is not free of charge. You need a place to store your website files on the internet. For this, you need a hosting provider. The initial cost is around $3-$10 per month. You will also need a domain name. A typical domain name costs around $10 per year.
- You will need to install WordPress. Luckily, quality hosting companies like HostArmada offer 1-click WordPress installation options, which makes installing and setting up a website feel like a breeze.
WordPress.com
WordPress.com is a hosting service, by Automattic, the company behind WordPress. This connection often leads to confusion between WordPress.com and the widely-used and open-source WordPress.org software.
The hosting service provided by WordPress.com is available in six different pricing tiers:
- Free – Offers basic features.
- Personal – Priced at $48 annually.
- Premium – Costs $96 per year.
- Business – Available for $300 annually.
- Ecommerce – Offered at $540 per year.
- VIP – Starts at $5000 monthly.
Now, let’s examine the advantages and disadvantages of using WordPress.com.
Advantages:
- It is free until you reach 1GB of space. After that, you need to switch to a paid plan.
Disadvantages:
- Unless you upgrade, you will have ads on your website. Your users will see those ads and you will not be making a profit from it.
- You are not allowed to sell ads on your website unless you upgrade to the Premium plan or above.
- You are not allowed to add additional functionalities on your website (cannot install plugins unless you upgrade to a paid plan,
- You are not allowed to customize the website beyond existing options. Free users can only choose from a short list of themes and cannot customize the look and feel of the website with additional css. You need a business plan or above to install a theme from the free WordPress theme repository.
- You need to upgrade your plan to use a custom domain name, otherwise you are stuck with myawesomesite.wordpress.com.
- WordPress.com reserves the right to delete your site at any moment if it is deemed to be in violation of its terms of service.
- A “Powered by WordPress.com” link will always be visible on your site unless you upgrade.
- You are very limited in selling products on your website, unless you upgrade to the eCommerce plan or higher.
Now that we are all on the same page and we are running out of patience to install WordPress.org software on our preferred hosting account, let’s move on.
Setting up hosting and domain
In this tutorial, we will be using HostArmada to set up a hosting account and domain name, as well as map the domain name to the hosting account. I have used their service for a long time and I am quite happy with it. Moreover, they generously provide a 75% discount for our readers with a coupon code NASIO75 on checkout (new clients only).
Creating an account with HostArmada and setting up hosting and a domain involves several steps:
- Visit HostArmada’s Website: Start by going to the HostArmada website.
- Choose a Hosting Plan: HostArmada offers various hosting plans (shared hosting, VPS hosting, dedicated CPU server hosting, etc.). Select a plan that best suits your needs. For most beginners, a shared hosting plan is usually sufficient.
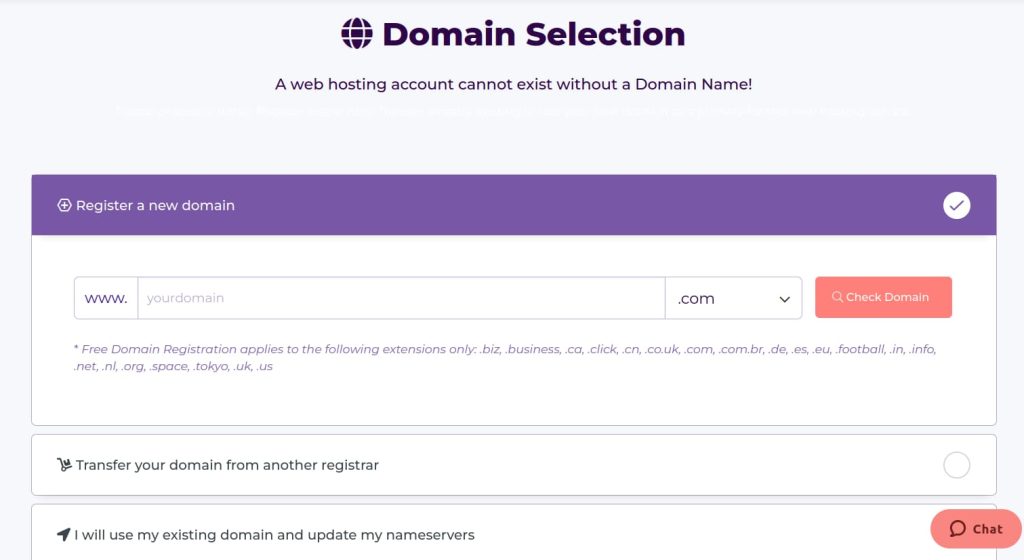
- Select a Domain Name: Once you choose a hosting plan, you will be prompted to choose a domain name. This could be a new domain name you want to register or an existing domain name you already own. If you are registering a new domain, HostArmada will give it to you for free as part of their hosting package.
- Create an Account: To proceed, you will need to create an account. This typically involves providing personal information, such as your name, email address, and contact details.
- Enter Billing Information: You’ll be asked to enter your billing information for the hosting service. This includes payment details like your credit card or PayPal information.
- Choose Hosting Package Duration: Decide on the duration of your hosting package. Longer durations often come with discounts but require a larger upfront payment.
- Add Extra Services (Optional): HostArmada might offer additional services like SEO tools, backup solutions, or enhanced security features. Choose any that you find necessary for your website.
- Review and Complete Your Purchase: Review all the details of your purchase, including the plan, domain name, duration, and additional services. Make sure everything is correct before finalizing your purchase.
- Access Your Hosting Dashboard: Once your purchase is complete, you’ll receive an email with login details for your hosting dashboard. This is where you can manage your hosting settings, install WordPress (or another CMS), create email accounts, and more.
Finally, allow yourself a 30-minute break (this is usually what it takes for the dns settings to propagate) and try to visit your new website via the browser URL address. If all goes well, you should be able to load the default html page from HostArmada. Please note, that in some rare cases, it might take up to 48 hours for the DNS settings to propagate, so do have some patience. If you need troubleshooting, check if the domain is mapped to the hosting provider (check the “Domains” tab from the Control panel) or contact the support team. You can send them an email or use the chat feature. I personally prefer the chat feature. They are very friendly and reply instantly.
Installing WordPress
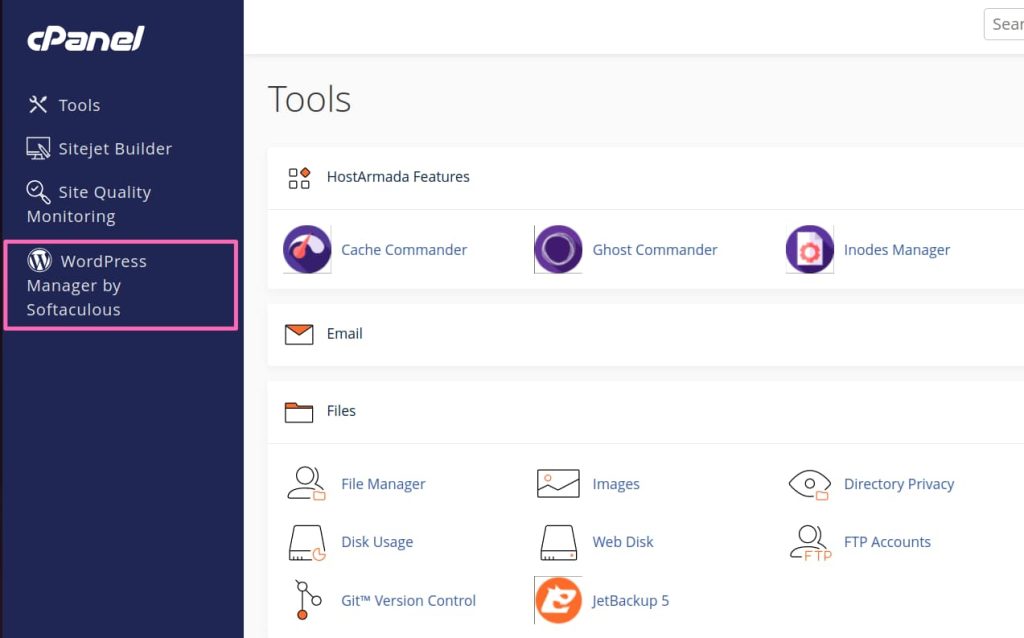
In your Hostarmada dashboard, go to Control Panel and click on WordPress Manager by Softaculous
Inside Softaculous, click on Install and fill in the website information. In “choose installation URL”, pick the domain name (if you cannot find the domain name, you will need to first add it from the Domains tab in the Control Panel, then try again). Add the site’s title, as well as your email address. For username and password, use a strong username and password and copy the information in a safe place (you will need it to log in to the WordPress admin panel in a while). Skip the section with the advanced options and the themes. We will add them later. When you are all set, click on install at the bottom of the page. Softaculous will do the heavy lifting for you and in a few seconds, it will give you the website link, where you will be able to login with myawesomesite/wp-admin.php. Congratulations, if you have made it this far, you already have a WordPress website. Now, let’s customize it!
Installing and Setting Up Prespa theme
To get the most out of this tutorial, I urge you to use Prespa theme. It is the flagman of Nasio Themes, perhaps the most beautiful and versatile theme ever created by our team. You can create any type of website thanks to its extensive theme options and numerous layouts. At the same time, the theme is extremely lightweight and easy to use. In this tutorial, we will be creating a fitness gym website but you will see how easy and straightforward it is to create any type of design with it. And the best part is that with Prespa theme you don’t need any additional plugins to customize your site – we will be using only core Gutenberg blocks provided by the default WordPress editor. No additional cost or additional learning curve is required! Now, let’s get started.
Once you log in, go to Appearance => Themes and click on the “Add New theme” button in the top right corner. In the search bar, type “Prespa” and then install and activate the theme. After you activate the theme, go to Appearance => Customize and you will load the starter content for Prespa theme. Click “Save”. Don’t worry if you don’t need some of the sections or you want to customize them – I will show you how to do that in the next section.
Customizing the Website
If you have followed us so far, you would have created a WordPress website and added demo content to Prespa theme. Now, let’s make some changes. To customize the homepage, click on the Edit Page in the top bar and you will see the page in the WordPress admin. The page consists of Gutenberg blocks and the Gutenberg blocks are collected into patterns. To get a nice overview of all the blocks being used on the site, you can click on the three dashes at the top left corner.
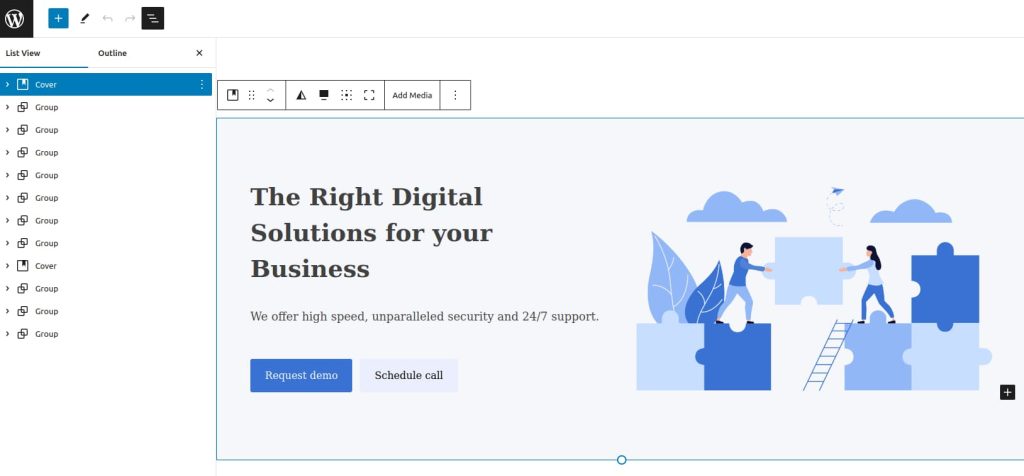
To customize any of the blocks, you first need to select it and this list view makes things very easy. To remove any of the sections, you can simply click on the three dots in the top part of the selected block and click on “delete”. To change the style of the block, click on the Styles icon in the right corner of the screen. For example, to change the color of the “Request demo” button, click on the element and then click on the Styles tab.
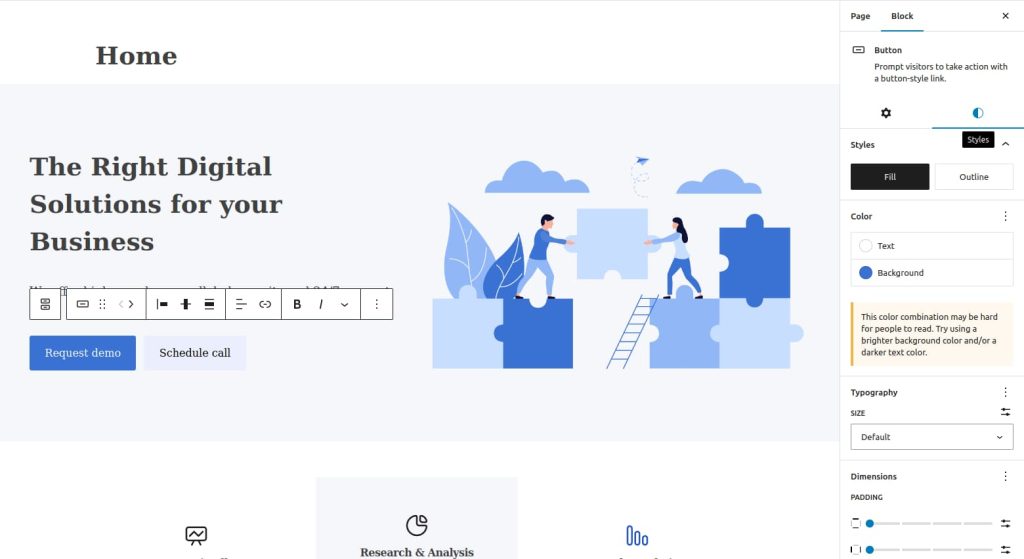
To change the text and the link of the button, just click on it and type the text you want. Click the attachment icon to add a link.
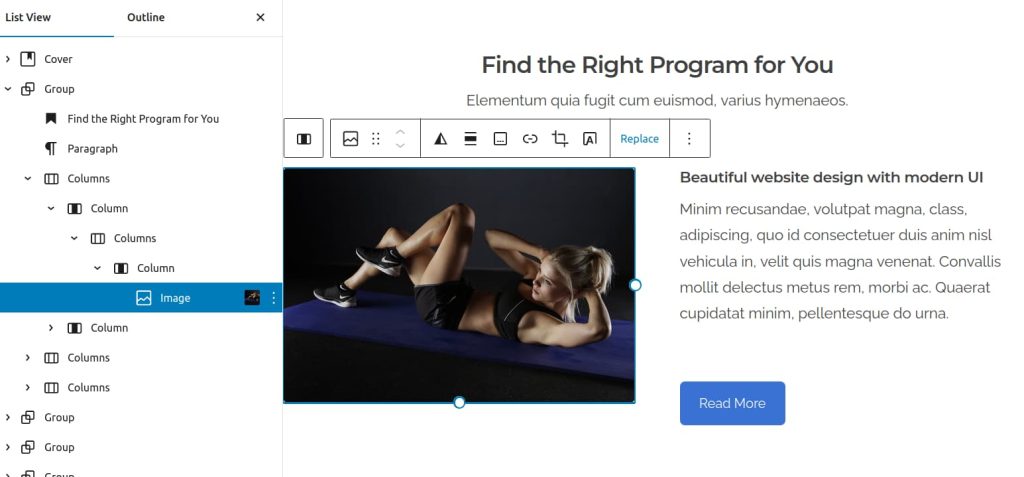
To change an image, click on it and click on “Replace”, then upload the image of choice.
Please do not forget to compress the image beforehand. It is important that you compress the images before uploading them to the site because large images decrease the loading speed of your website which negatively affects user experience and SEO. Besides, Compressing images before uploading them to a website will have a positive effect on your website for several reasons, including Faster Load Times, Reduced Bandwidth Usage, Improved Website Performance, and Storage Space Efficiency. You can compress the images with the help of Squoosh app. It is powered by Google and lets you compress and resize the images online, so you don’t need to install anything on your PC or laptop. You can also use an extension (plugin) that does this automatically. I recommend WP Optimize.
More Patterns
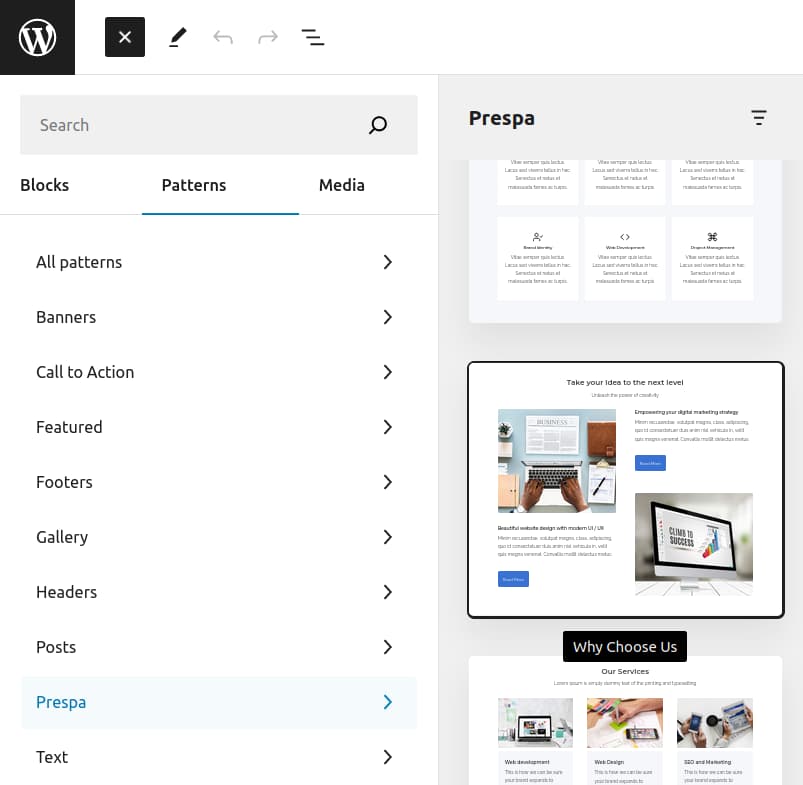
Make sure to check all the patterns that Prespa theme offers. Patterns are a set of blocks that are compiled in a special and visually appealing way, ready to use on your website. Prespa comes with more than a dozen pre-built patterns, ready to use by you, all for free. To pick a pattern, click on the plus icon on the top left corner, go to the patterns tab and then click on “Prespa”. You will see a list of all the patterns provided by Prespa theme. Insert a pattern to add it to the block editor.
You can also explore the pattern library and directly copy-paste a layout that you like on your website.
Site Title and Description
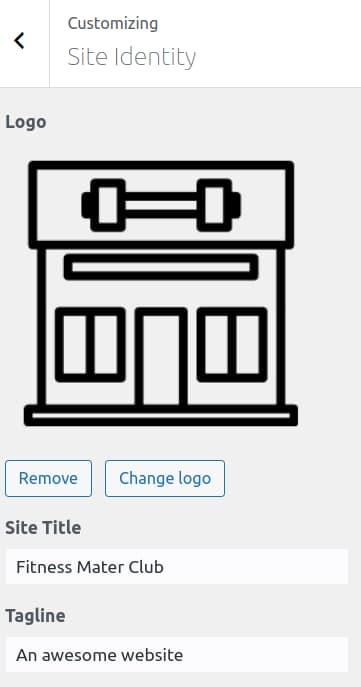
Go to the theme options of Prespa theme (Appearance => Customize) and click on Site Identity. There you can add a logo, as well as update the title and description of your website. You can also add a site icon (favicon) in this section.
To craft your logo, you can use a free tool called Logomakr. It can do a decent job if you are on a tight budget. However, I recommend you hire a designer for this job, as in this way your website will look truly professional and unique.
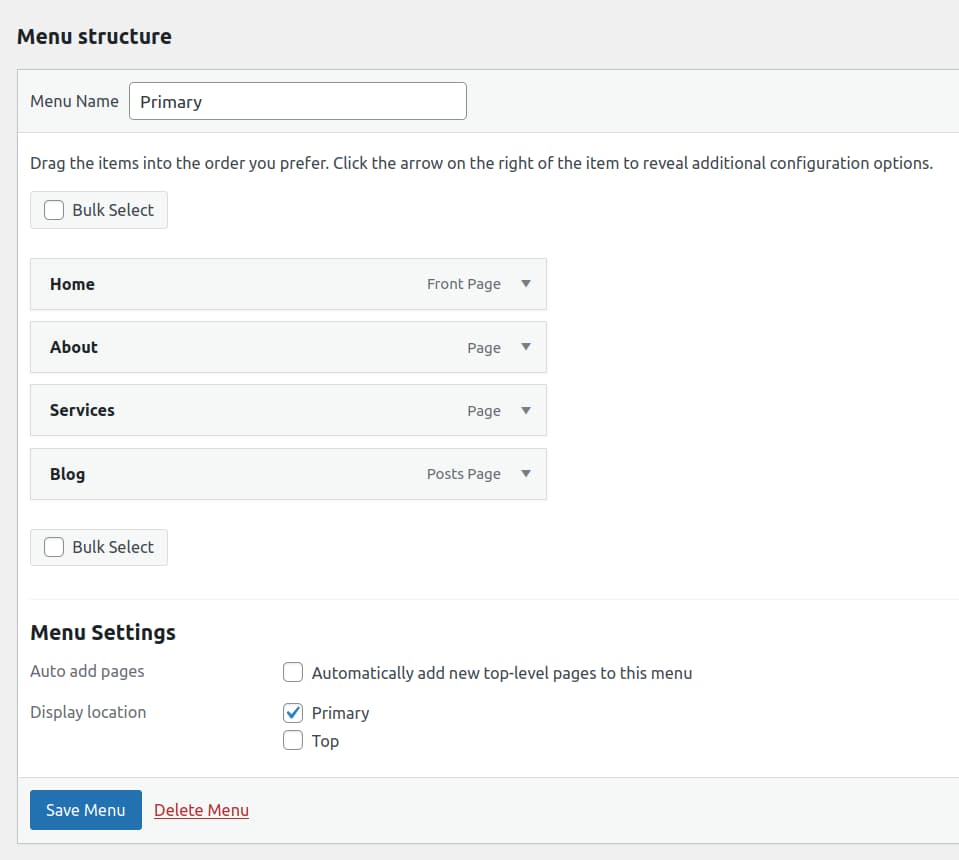
Create or edit the site menu
Click on Appearance => Menus. To edit an existing menu, select it from the dropdown on the top of the page: “Select a menu to edit”. To create a new menu, click on “create a new menu”. After you make your changes, do not forget to click on the “Save menu”. Make sure you have assigned the menu a location – otherwise, it won’t display!
For more customization options and a more in-depth tutorial on the features that Prespa theme provides, check the official Prespa theme documentation
Creating a Contact Form
WordPress is a great software that comes with all the basic features you need to have a website. Now that we have added a theme and customized the layout, it is time to add additional functionalities to it. Think about WordPress as Windows that does not have any programs installed yet. To have a contact form, we need a “program” or a “plugin” if we use WordPress terminology. So, let’s go on and install a contact form plugin. We will be using Contact Form 7 plugin. It is a great free plugin that lets you create and customize any type of contact form on your website.
Adding a contact form to your WordPress site using the “Contact Form 7” plugin is a fairly straightforward process. To install it, navigate to Plugins => Add New. In the search plugins search field, type “Contact Form 7” and press “Enter”. After installation, click Activate to start using the plugin.
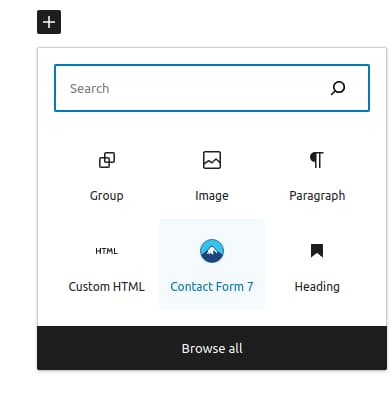
After you install and activate the plugin, create a page from Pages => Add new and call it “Contact”. In the content add a contact form Gutenberg block by clicking on the “Add block” plus sign in the content of the page (the block was added by the Contact Form 7 plugin).
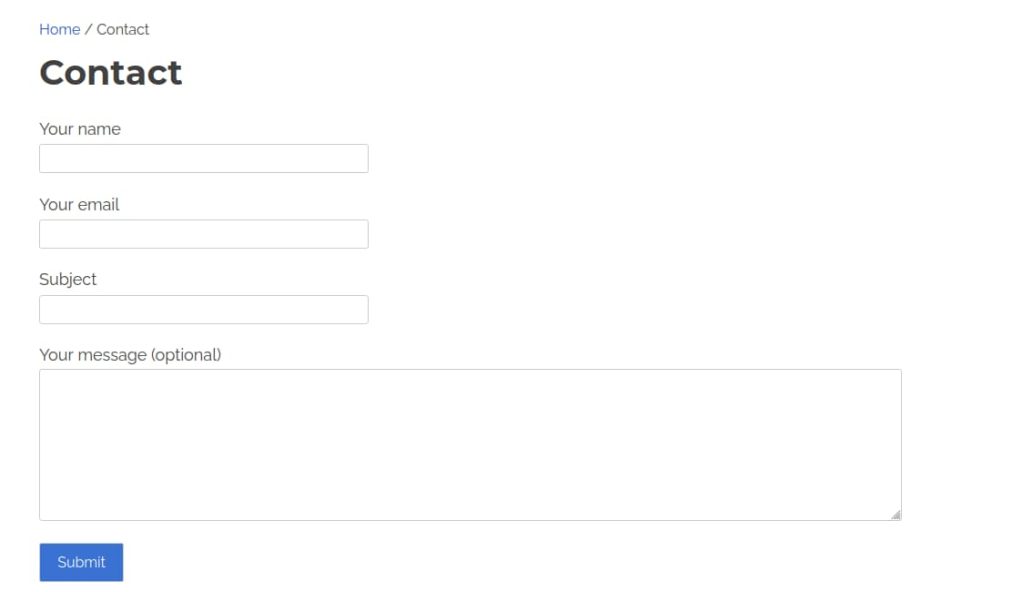
Add the contact form and save the page. If all goes well, you should see a contact form on your website:
Embedding a Map to WordPress
The simplest way to add a map to WordPress is to embed it with the custom html Gutenberg block. For this, first, go to Google Maps and find the location you want to display. Once you’ve selected the location, click on the share button in the right corner of the location tooltip window. In the new popup window, switch to the “Embed a map” tab.
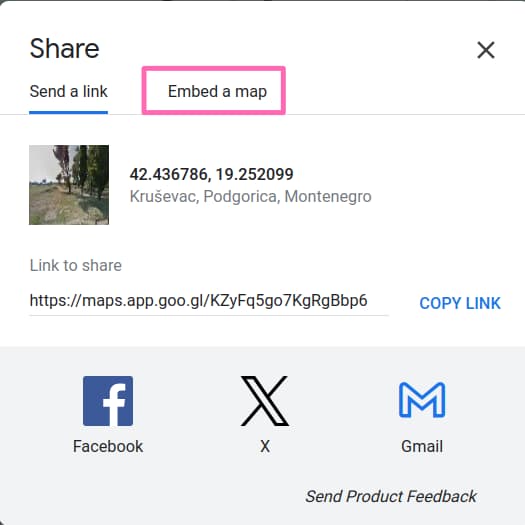
Here, you’ll see the HTML code for an iframe, which you can copy by clicking on the “Copy HTML” button. Finally, paste this HTML code into the code inside the custom html block. This will embed the Google Maps iframe, displaying the selected location directly on your website.
Backing up your WordPress website
To back up a WordPress website using the Duplicator plugin, begin by installing and activating the plugin through your WordPress dashboard. In the WordPress admin interface, go to Plugins => Add New. In the search plugins search field, type “Duplicator” and press “Enter”. Install and activate the plugin. Once Duplicator is active, navigate to the Duplicator section on your dashboard. Here, you’ll find the option to create a new package; a package in Duplicator is essentially a complete backup of your site.
Start the package creation process, and Duplicator will guide you through a series of steps to configure your backup. This includes naming the package and choosing what to include in the backup. After configuring the settings, proceed to build the package. Duplicator then compiles all the necessary files and database information into one downloadable package. Once the build process is complete, you’ll be provided with two files to download: an installer and an archive file. Download both files and store them safely. These files are what you’ll use to restore your WordPress site in case of a failure or if you want to clone the site to a different location. It’s a good practice to regularly create new packages to ensure you have a recent backup of your site.
Congratulations! If you have made it this far, you have managed to create and set up a WordPress website without touching a line of code! As you can see, making a WordPress website is not that hard anymore and you can do it with minimal costs. At the same time, you have made a big accomplishment and the best thing about it all is that unlimited opportunities are lying ahead of you! If you found this tutorial useful, make sure to subscribe and share it on social media – it helps us grow and keep us motivated to create materials that are useful for the community. I wish you good luck with your project!
Editor’s note: We might earn a commission from partner links. Commissions do not affect our editors’ opinions or evaluations.