I am an avid reader who spends a lot of time reading articles online. One thing I have always found missing is that there is no option to listen to content while doing something else. Don’t get me wrong, I enjoy reading but also time is of essence and sometimes I want to do something else while scanning through articles and learning new things. Of course, there are podcasts to listen to and different tools you can use to listen to text online, e.g. text to speech (TTS) browser extensions or screen readers but they are either costly or limited in their functionality, especially for non-English articles. Also, constant reading puts strain on your eyes and can cause problems in the long run. On the other hand, websites that have audio version of their content are better for accessibility, since they provide different means to access the content. Since I work as a web developer, an idea popped up – make a WordPress plugin that uses AI to generate audio from text and share it with others, so that more and more websites start providing this feature. Since you are already reading this article, I don’t think you need more persuasion why you might need this feature on your website, so let’s get straight into it.
Setting up Text to Speech on your website
To add functionality to generate audio from your blog post or page, you need to install and configure the Simple Text to Speech plugin. It is a lightweight free plugin that uses the Google Cloud Text-to-Speech API (free for up to 1 million characters) to generate high quality AI voices. Once you install and activate it, navigate to the “Text to Speech” sub page in the Settings menu item in the left sidebar or in the plugin list page, hover over the plugin and click “Settings”.
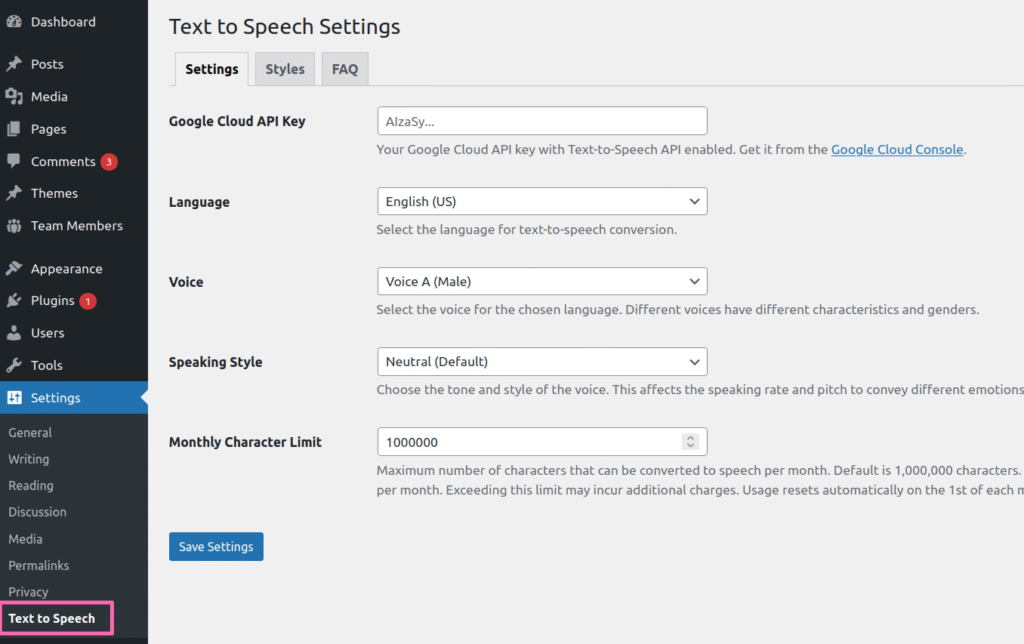
By default, the language of choice is English but you can choose between 50+ languages, as well as different AI voices and speaking styles. All you need to do is to connect the plugin to Google Cloud Text-to-Speech API. Google Cloud provides a generous free tier with up to 1 million free characters per month for their WaveNet AI voices. For more information, you can check their pricing. By default, the plugin sets a 1 million character limit, so you can stay on Google Cloud’s free tier but you can increase it if you decide you want to use their service more. The plugin currently uses WaveNet voices but we are planning to introduce more options soon.
Google Cloud console
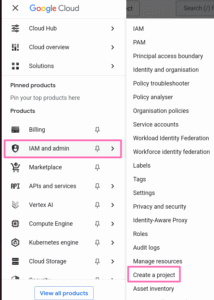
To make the plugin work, you need to obtain an API key from the Google Cloud and add it to the plugin’s Settings page. To do this, go to Google Cloud Console, click the navigation menu in the top left and then IAM & Admin > Create a Project.
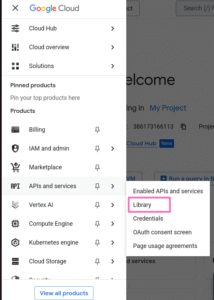
After you create a project, you need to enable the Text-to-Speech API. Go to APIs and Services > Library and search for the Cloud Text-to-Speech API via the search bar, then click “enable”.
Next, you need to enable billing for your account. Even if you only plan to use the free tier, Google Cloud requires a billing account. Free-tier usage is included automatically — you’ll only be charged if you exceed the quota of 1 million characters for the Google Cloud Text-to-Speech API. Go to Billing > Manage Billing Accounts and create a billing account. Finally, you need to create an API key and restrict it. To create the API key, navigate to APIs & Services > Credentials. Click on + Create Credentials > API key.
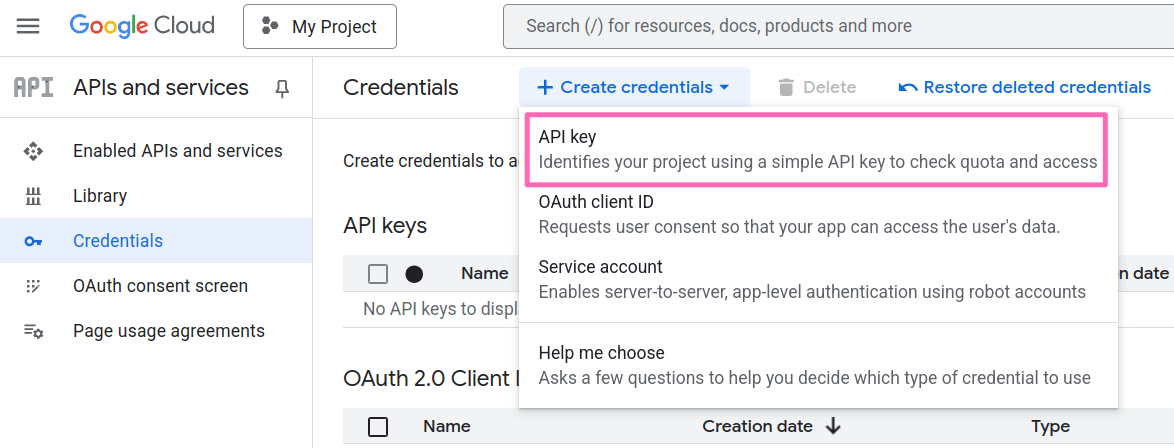
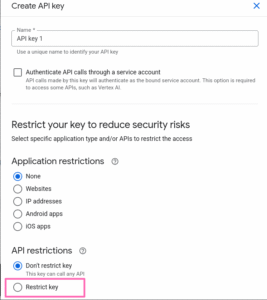
Enter the name of the key and restrict it to use the Cloud Text-to-Speech API only. A new API key will be generated immediately. Copy the API key and paste it in the plugin settings page.
Generate Audio for your WordPress Posts and Pages
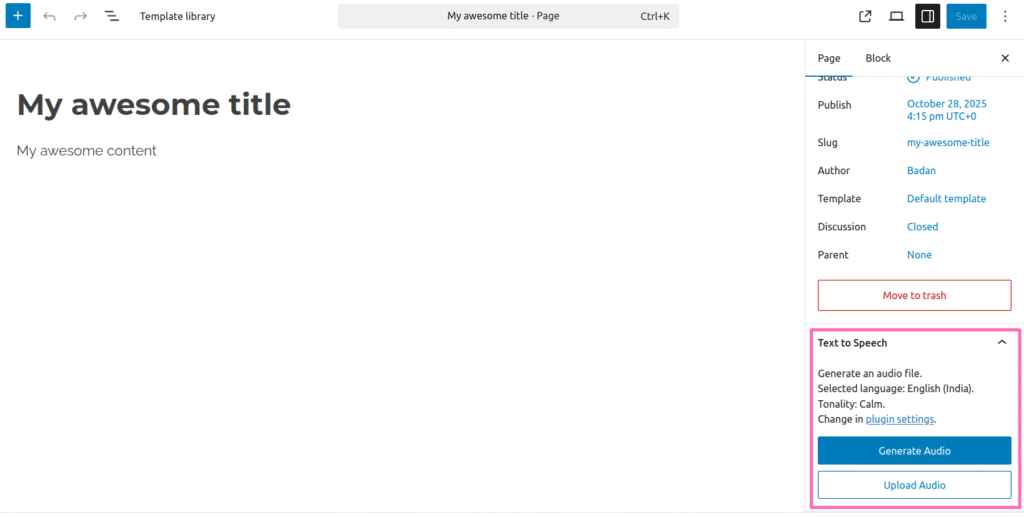
To generate audio version of your post or page, just edit the page and click on generate audio:
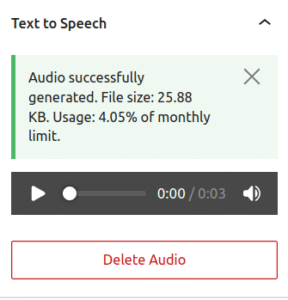
Once the audio is generated, some useful information is displayed, e.g file size and usage that remains until reaching the cap set in the plugin settings page. The audio files are stored in the media library.
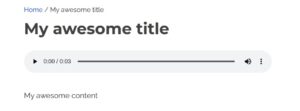
After you save your post or page, the generated audio appears on top of your article and your visitors can now listen to it.